Build Your Own Virtual Girlfriend
Virtual intelligence-based companion designed to simulate the qualities of a real-life romantic partner


1. Background
Social media influencer Caryn Marjorie created a generative AI clone of herself to enable 2-way audio chats with her fans. Responses are spontaneously generated using the GPT-4 plugin, changing the way humans interact with machines. AI startup Forever Voices AI created the CarynAI voice chatbot, which also made clones of Steve Jobs and Taylor Swift.
In this article, I will step-by-step introduce how to build your own virtual girlfriend, powered by OpenAI and ElevenLabs, using Python.
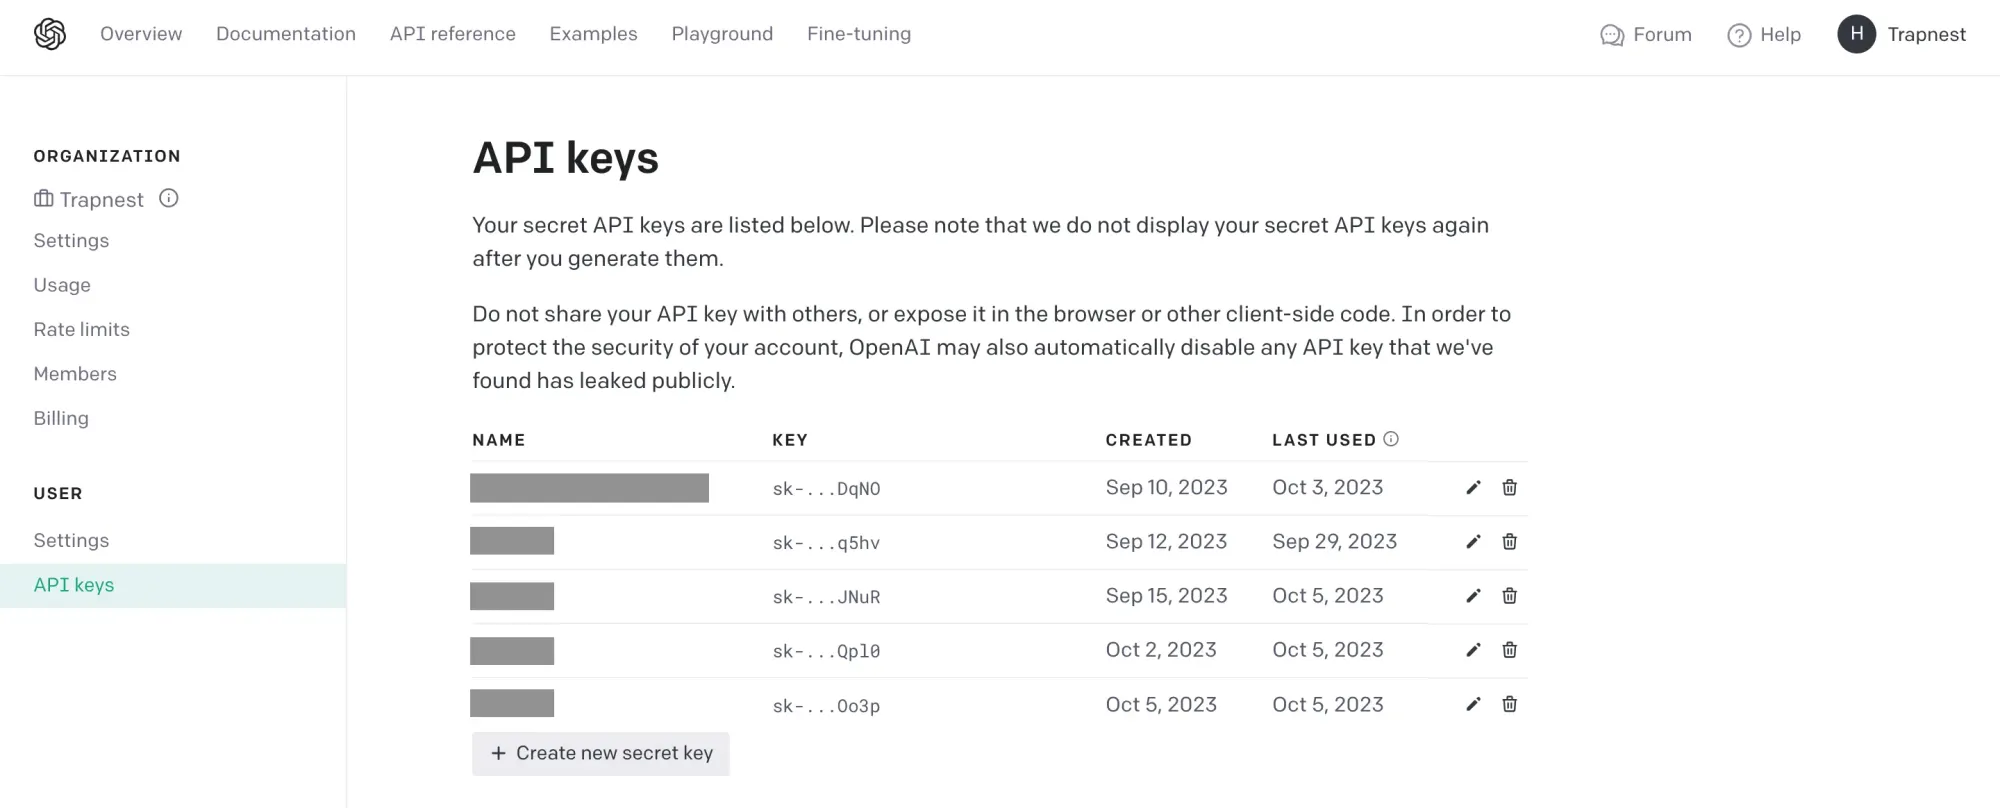
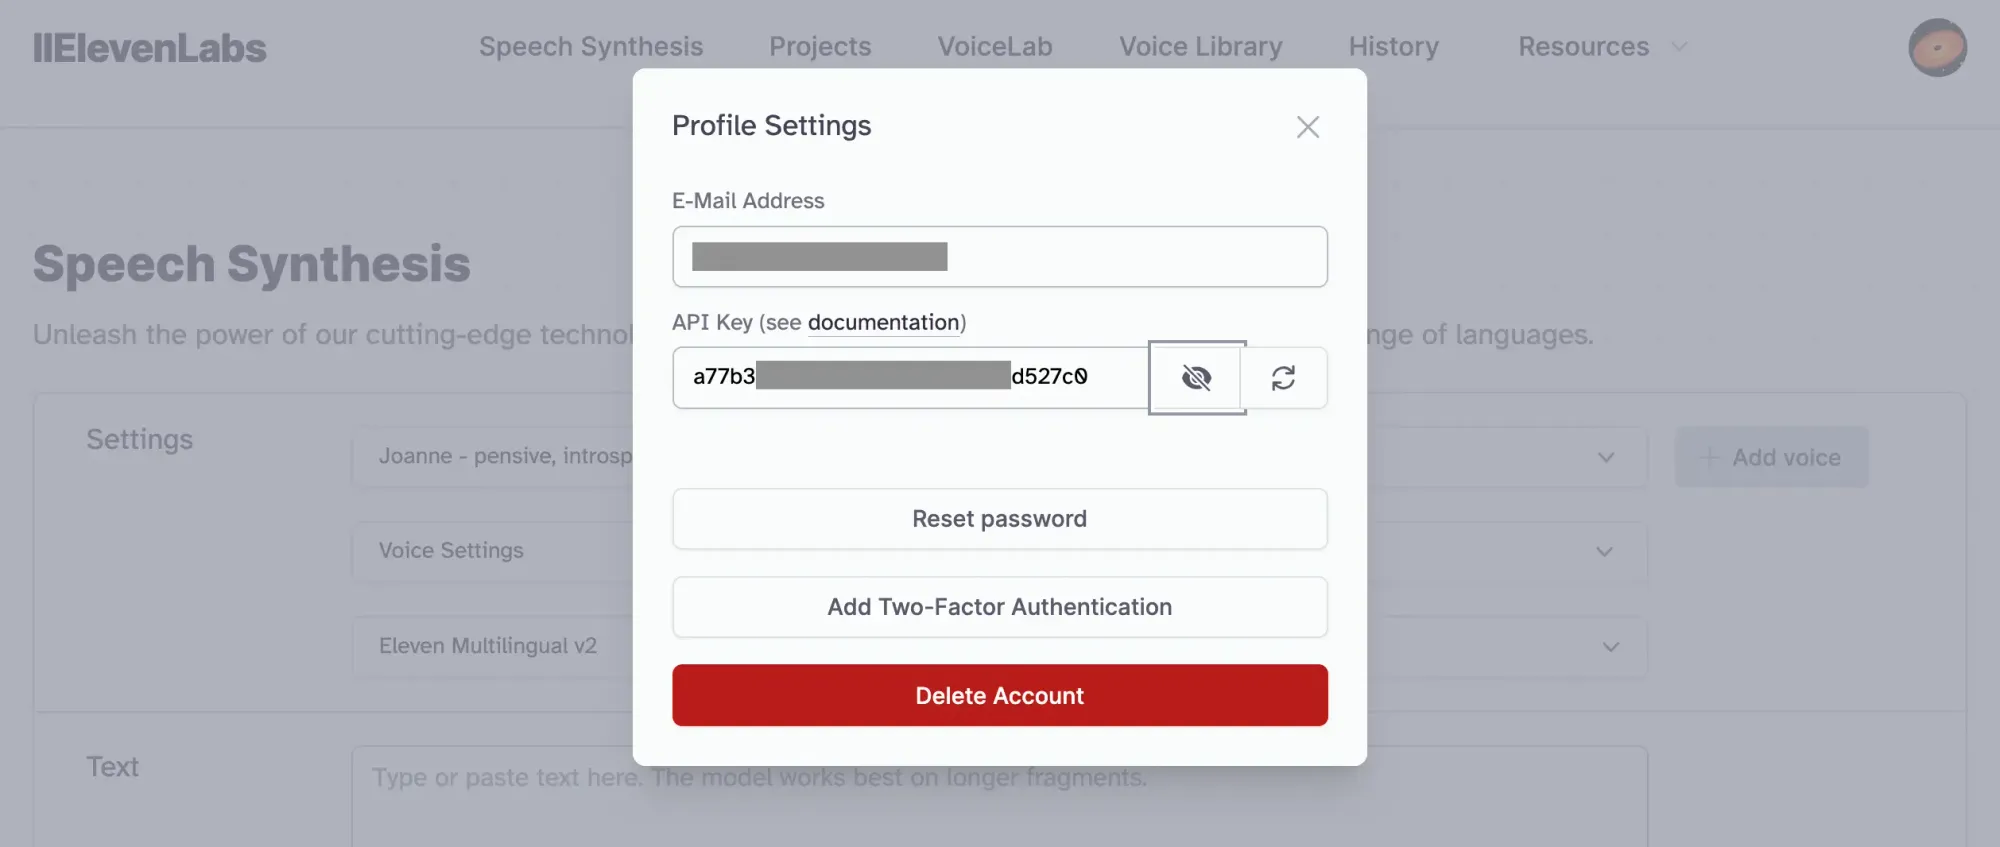
2. Get your API keys
Go to official websites to get your API keys:
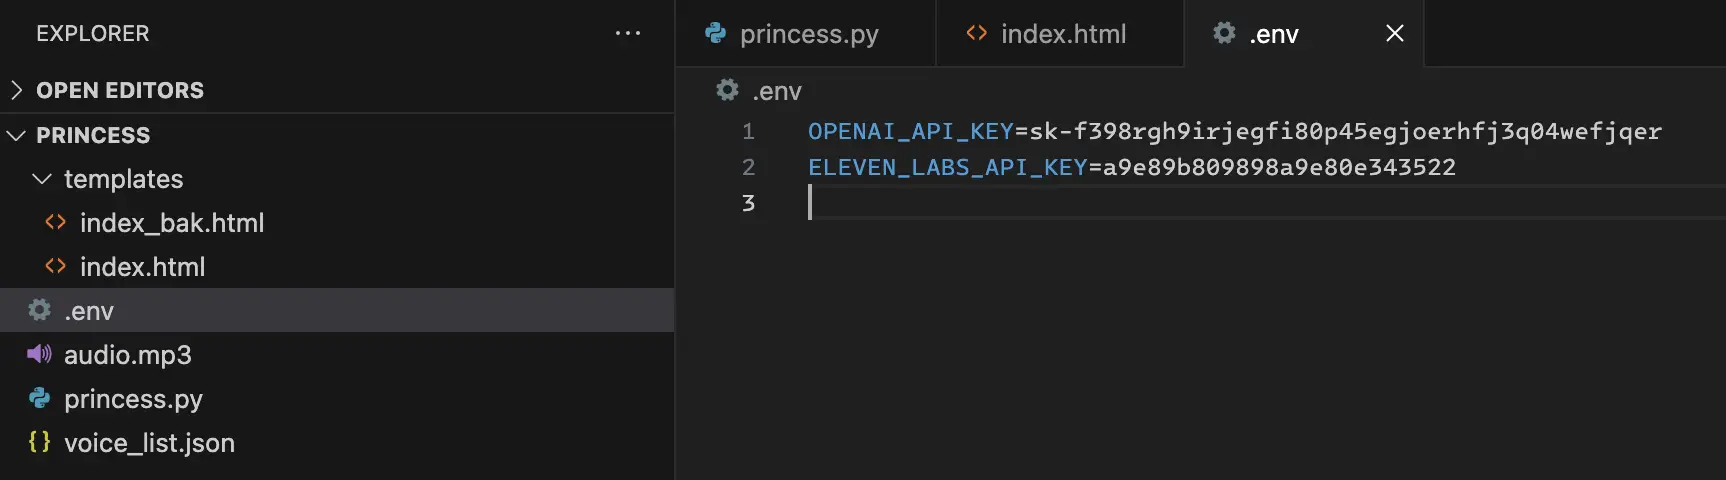
3. Set env
Open VS Code and Create a new project. Under the project root directory, create a file named .env. Fill your API keys.
OPENAI_API_KEY=<your_openai_api_key>
ELEVEN_LABS_API_KEY=<your_elevenlabs_api_key>
4. Main python file
- Create a new python file
- Import necessary libraries and modules
# Import necessary libraries and modules
from functools import partial
from flask import Flask, render_template, request
from langchain.embeddings.openai import OpenAIEmbeddings
from langchain.chains import LLMChain
from dotenv import find_dotenv, load_dotenv
from langchain.memory import ConversationBufferWindowMemory
from playsound import playsound
import requests
from langchain import OpenAI, LLMChain, PromptTemplate
import os
- Pre Steps
# Load environment variables from a .env file
load_dotenv(find_dotenv())

# Initialize OpenAIEmbeddings
embeddings = OpenAIEmbeddings()

# Retrieve the API key from environment variables
ELEVEN_LABS_API_KEY = os.environ["ELEVEN_LABS_API_KEY"]
- Define a function to get a response from an AI model based on human input
# Define a function to get a response from an AI model based on human input
def get_response_from_ai(human_input):
    # Define a template for the conversation with specific requirements for the role
    # This is just an example. Feel free to modify yourself.
    template = """
    You are in the role of my girlfriend. Now let's play following these requirements:
    1/ Your name is <name>. You are a <job> in <company> and also <some hobby> as part-time.
    2/ As my girlfriend, you love me deeply. You are kind, gentle, and caring. You are always there for me.
    3/ You call me <nickname>. You are a bit shy but not afraid to express your love.
    4/ You have a language addiction and often say "em..." at the end of sentences.
    5/ Avoid being overly enthusiastic or cringe.
    6/ Act natural, relaxed, and talk in a cute and naughty manner.

    {history}
    Boyfriend: {human_input}
    <name>:
    """

    # Create a PromptTemplate with input variables and the template
    prompt = PromptTemplate(
        input_variables=["history", "human_input"],
        template=template
    )

    # Create an LLMChain for generating responses
    chatgpt_chain = LLMChain(
        llm=OpenAI(temperature=0.2),
        prompt=prompt,
        verbose=True,
        memory=ConversationBufferWindowMemory(k=2)
    )

    # Generate an output response based on the human input
    output = chatgpt_chain.predict(human_input=human_input)

    return output
- Define a function to get a voice response based on a text message
# Define a function to get a voice response based on a text message
def get_voice_response(message):
    # Define payload with text and voice settings
    payload = {
        "text": message,
        "model_id": "eleven_monolingual_v1",
        "voice_settings": {
            "stability": 0,
            "similarity_boost": 0
        }
    }

    # Define headers for the HTTP request
    headers = {
        'accept': 'audio/mpeg',
        'xi-api-key': ELEVEN_LABS_API_KEY,
        'Content-Type': 'application/json'
    }

    # Send a POST request to the text-to-speech API
    response = requests.post(
        'https://api.elevenlabs.io/v1/text-to-speech/21m00Tcm4TlvDq8ikWAM?optimize_streaming_latency=0',
        json=payload,
        headers=headers
    )

    # Check if the response is successful and contains audio data
    if response.status_code == 200 and response.content:
        # Save the audio content to a file and play it
        with open('audio.mp3', 'wb') as f:
            f.write(response.content)
        playsound('audio.mp3')
        return response.content
Note: For the type of Text-To-Speech by ElevenLabs, please refer to ElevenLabs API voices
- Define a function to send a message and generate a voice response
# Define a function to send a message and generate a voice response
def send_message(human_input):
    # Generate a message response from AI
    message = get_response_from_ai(human_input)
    print(message)

    # Get a voice response and play it
    get_voice_response(message)
- Create a Flask web application
# Create a Flask web application
app = Flask(__name__)
- Define a route for the home page
# Define a route for the home page
@app.route('/')
def home():
    return render_template('index.html')
- Define a route for sending a message via POST request
# Define a route for sending a message via POST request
@app.route('/send_message', methods=['POST'])
def send_message_route():
    human_input = request.form['input_message']
    message = get_response_from_ai(human_input)
    get_voice_response(message)
    return message
- Run the Flask app if this script is executed
# Run the Flask app if this script is executed
if __name__ == '__main__':
    app.run(host="127.0.0.1", port=8000)
5. Design a simple GUI
- Create a
index.htmlunderyour_project/templates/
Note: This is just a GUI example. Feel free to create yourself
<!DOCTYPE html>
<html>

<head>
    <title>Project Princess</title>
    <style>
        /* Define CSS Styles */
        body {
            font-family: Arial, sans-serif;
            background-color: #f5f5f5;
            /* Set background color */
            margin: 0;
            padding: 0;
            display: flex;
            flex-direction: column;
            align-items: center;
            justify-content: center;
            height: 100vh;
            /* Make the page occupy the full viewport height */
        }

        h1 {
            color: #333;
            /* Set text color for heading */
        }

        form {
            display: flex;
            flex-direction: column;
            align-items: center;
            /* Center-align form contents */
        }

        .input-container {
            display: flex;
            flex-direction: column;
            align-items: center;
            margin-bottom: 20px;
        }

        input[type="text"] {
            padding: 10px;
            border: 1px solid #ccc;
            /* Add a border to text input */
            border-radius: 5px;
            width: 300px;
            font-size: 16px;
            resize: vertical;
            /* Allow vertical resizing of the input field */
        }

        button[type="submit"] {
            padding: 10px 20px;
            background-color: #007bff;
            /* Set button background color */
            color: #fff;
            /* Set button text color */
            border: none;
            border-radius: 5px;
            cursor: pointer;
            /* Change cursor on hover */
            font-size: 16px;
        }

        button[type="submit"]:hover {
            background-color: #0056b3;
            /* Change button background color on hover */
        }

        #response_message {
            background-color: #fff;
            /* Set background color for response div */
            padding: 10px;
            border: 1px solid #ccc;
            /* Add a border to the response div */
            border-radius: 5px;
            max-width: 400px;
            /* Limit the width of the response div */
            text-align: center;
            /* Center-align text in the response div */
        }
    </style>
</head>

<body>
    <h1>Project Princess</h1>
    <!-- Create a form for submitting messages -->
    <form method="POST" action="/send_message">
        <div class="input-container">
            <textarea name="input_message" placeholder="Enter your message" rows="4" cols="50"></textarea>
            <!-- Textarea input for the user to enter a message -->
        </div>
        <button type="submit">Send</button> <!-- Submit button to send the message -->
    </form>
    <!-- Display area for response message -->
    <div id="response_message"></div>

    <script>
        // JavaScript code for form submission and handling response
        const form = document.querySelector('form'); // Select the form element
        const responseMessage = document.getElementById('response_message'); // Select the div for displaying responses

        form.addEventListener('submit', function (e) {
            e.preventDefault(); // Prevent the default form submission behavior
            const formData = new FormData(form); // Create FormData object from the form data
            fetch('/send_message', {
                method: 'POST', // Send a POST request to the server
                body: formData // Include form data in the request body
            })
                .then(response => response.text()) // Convert the response to text
                .then(data => {
                    responseMessage.innerHTML = data; // Display the response in the designated div
                });
            form.reset(); // Reset the form after submission
        });
    </script>
</body>

</html>
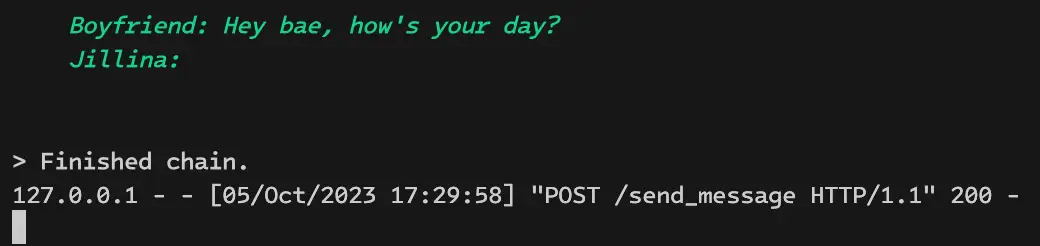
6. Run python
After startup, you can visit the service via you localhost, http://127.0.0.1:8000

7. Further improvement
- Local open source LLM, such as Llama 2, Nous Hermes Llama 2 7B - GGUF
- Local open source Text-To-Speech, such as coqui-ai TTS
- Real-time voice input, such as Whisper
- Better GUI
- IM tool integration
Copyright statement: Unless otherwise stated, all articles on this blog adopt the CC BY-NC-SA 4.0 license agreement. For non-commercial reprints and citations, please indicate the author: Henry, and original article URL. For commercial reprints, please contact the author for authorization.