The AI Storyteller: Creating Video Voiceovers with GPT-4 Vision
Unveiling the Future of AI-Powered Media: OpenAI's Latest Multimodal Update


OpenAI has just unveiled one of its most significant updates, making their models cheaper, faster, and more extensive than ever. This update introduces "Banner Control" for function calling and larger language model outputs. These improvements promise to open up new possibilities for developing exciting AI-driven applications.

Within just 24 hours of the release, developers and enthusiasts worldwide have begun experimenting with these enhanced capabilities. From analyzing website landing pages to generating video voiceovers, the potential applications are boundless. In this blog post, we'll explore one fascinating application where you can create video voiceovers using GPT-4V.
The Video Voiceover Generator
The video voiceover generator is a remarkable example of what GPT-4V can achieve. It's a tool that allows you to upload a short video clip, provide a prompt, and then generate a new video with a voiceover based on the prompt. The process is surprisingly straightforward, thanks to OpenAI's platform and tutorials provided by the community.
Building the Video Voiceover Generator
To create the video voiceover generator, you'll need to follow these steps:
- Set up the Environment: Start by creating a project in a code editor, like Visual Studio Code. You'll need to add your OpenAI API key in an environment variable.
# Import necessary libraries
from dotenv import load_dotenv
from IPython.display import display, Image, Audio
from moviepy.editor import VideoFileClip, AudioFileClip
import cv2
import base64
import time
import io
import openai
import os
import requests
import streamlit as st
import tempfile
import numpy as np

# Load environment variables from a .env file
load_dotenv()
- Video to Frames: The first function, "video to frames," takes the uploaded video, converts it into individual frames, and calculates the video's duration. This information is essential for generating a voiceover of an appropriate length.
# Function to extract frames from a video file
def video_to_frames(video_file):
    # Create a temporary file to write the video content
    with tempfile.NamedTemporaryFile(delete=False, suffix='.mp4') as tmpfile:
        tmpfile.write(video_file.read())
        video_filename = tmpfile.name

    # Obtain the duration of the video using moviepy
    video_duration = VideoFileClip(video_filename).duration

    # Read the video frames and convert them to base64 format
    video = cv2.VideoCapture(video_filename)
    base64Frames = []
    while video.isOpened():
        success, frame = video.read()
        if not success:
            break
        _, buffer = cv2.imencode(".jpg", frame)
        base64Frames.append(base64.b64encode(buffer).decode("utf-8"))
    video.release()

    # Print the number of frames read and return the frames, filename, and duration
    print(len(base64Frames), "frames read.")
    return base64Frames, video_filename, video_duration
- Frames to Stories: This function converts the image frames into a coherent script based on a user-provided prompt. It breaks down the frames into smaller groups (typically 25 frames per group) and sends them to GPT-4V for generating a story.
# Function to create a story based on frames using OpenAI's GPT-4
def frames_to_story(base64Frames, prompt):
    # Prepare messages with frames and a user-defined prompt
    PROMPT_MESSAGES = [
        {
            "role": "user",
            "content": [
                prompt,
                *map(lambda x: {"image": x, "resize": 768},
                     base64Frames[0::25]),
            ],
        },
    ]
    # Define parameters for OpenAI's ChatCompletion model
    params = {
        "model": "gpt-4-vision-preview",
        "messages": PROMPT_MESSAGES,
        "api_key": os.environ["OPENAI_API_KEY"],
        "headers": {"Openai-Version": "2020-11-07"},
        "max_tokens": 500,
    }
    # Get the AI-generated content based on the frames and prompt
    result = openai.ChatCompletion.create(**params)
    print(result.choices[0].message.content)
    return result.choices[0].message.content
- Text to Audio: Once you have the script, you can convert it into a voiceover using OpenAI's text-to-speech model. This function generates an audio file from the generated text.
# Function to convert text to audio using OpenAI's TTS model
def text_to_audio(text):
    # Request generation of audio based on the provided text
    response = requests.post(
        "https://api.openai.com/v1/audio/speech",
        headers={
            "Authorization": f"Bearer {os.environ['OPENAI_API_KEY']}",
        },
        json={
            "model": "tts-1",
            "input": text,
            "voice": "onyx",
        },
    )

    # Handle errors in the request
    if response.status_code != 200:
        raise Exception("Request failed with status code")

    # Convert audio content to a BytesIO object
    audio_bytes_io = io.BytesIO()
    for chunk in response.iter_content(chunk_size=1024 * 1024):
        audio_bytes_io.write(chunk)
    audio_bytes_io.seek(0)

    # Save audio content to a temporary file
    with tempfile.NamedTemporaryFile(delete=False, suffix='.wav') as tmpfile:
        for chunk in response.iter_content(chunk_size=1024 * 1024):
            tmpfile.write(chunk)
        audio_filename = tmpfile.name

    return audio_filename, audio_bytes_io
- Merge Audio and Video: The final step is to combine the audio and video files to create the video with the generated voiceover.
# Function to merge audio with the original video
def merge_audio_video(video_filename, audio_filename, output_filename):
    # Open the video and audio files using MoviePy
    video_clip = VideoFileClip(video_filename)
    audio_clip = AudioFileClip(audio_filename)

    # Merge the video and audio clips
    final_clip = video_clip.set_audio(audio_clip)

    # Write the merged content to a new video file
    final_clip.write_videofile(
        output_filename, codec='libx264', audio_codec='aac')

    # Close the video and audio clips
    video_clip.close()
    audio_clip.close()

    return output_filename
- Main Function: This step is mainly to properly set the prompt and duration, also manage the temp files.
# Define the main function for the Streamlit app
def main():
# Set Streamlit page configuration and title
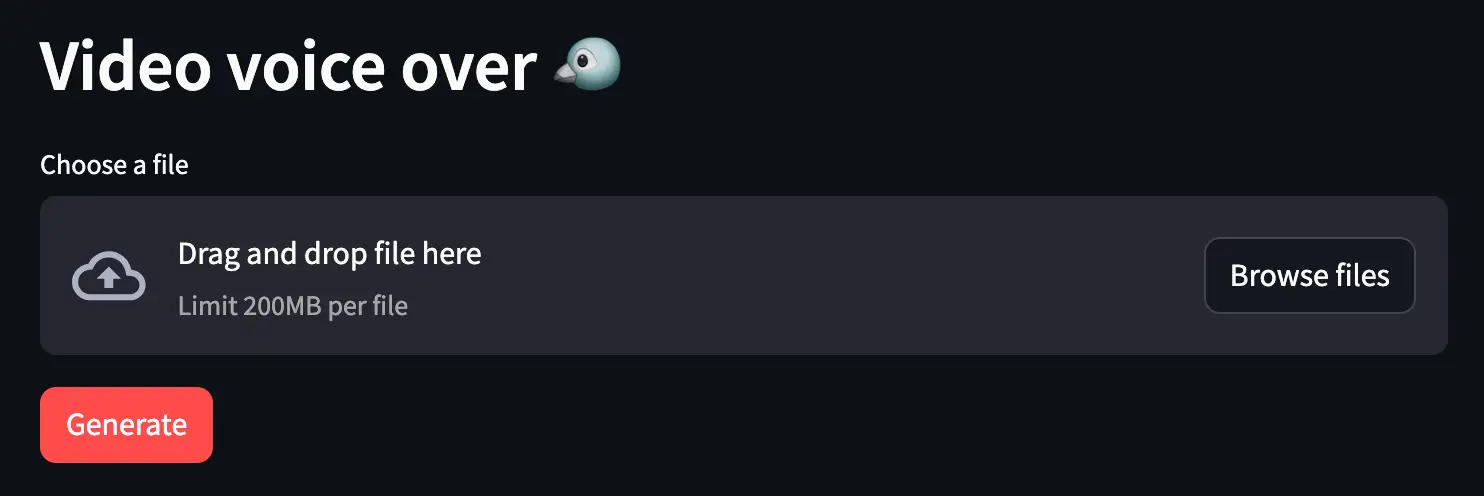
st.set_page_config(page_title="Video voice over", page_icon=":bird:")
st.header("Video voice over :bird:")
# Allow users to upload a video file
uploaded_file = st.file_uploader("Choose a file")
# If a file is uploaded, display it and prompt for a voice-over script
if uploaded_file is not None:
st.video(uploaded_file)
prompt = st.text_area(
"Prompt", value="These are frames of a quick product demo walkthrough...")
# When 'Generate' button is clicked and file is uploaded
if st.button('Generate', type="primary") and uploaded_file is not None:
with st.spinner('Processing...'):
# Extract frames, video filename, and duration
base64Frames, video_filename, video_duration = video_to_frames(
uploaded_file)
# Estimate word count and update the prompt
est_word_count = video_duration * 2
final_prompt = prompt + f"(This video is ONLY {video_duration} seconds long, so make sure the voice over MUST be able to be explained in less than {est_word_count} words)"
# Generate a text story based on frames and the updated prompt
text = frames_to_story(base64Frames, final_prompt)
st.write(text)
# Convert the generated text to audio
audio_filename, audio_bytes_io = text_to_audio(text)
# Define output filenames for the final video
output_video_filename = os.path.splitext(video_filename)[
0] + '_output.mp4'
final_video_filename = merge_audio_video(
video_filename, audio_filename, output_video_filename)
# Display the final video with the merged audio
st.video(final_video_filename)
# Clean up temporary files
os.unlink(video_filename)
os.unlink(audio_filename)
os.unlink(final_video_filename)
- Run Streamlit:
streamlit run app.py
Using the Video Voiceover Generator
To use the video voiceover generator, follow these steps:
-
Upload a short video clip of your choice.
-
Provide a prompt for the voiceover. The default prompt suggests creating a short voiceover script for the video.
-
Click the "Generate" button.
The generator will process the video, create a script based on the prompt, generate a voiceover, and merge it with the video. The resulting video will feature the voiceover, effectively narrating the content in the video.
Real-World Applications
The possibilities with the video voiceover generator are intriguing. It can be used for a range of applications, from creating educational content and tutorials to enhancing marketing videos or even for generating humorous voiceovers for fun.
Beyond video voiceovers, OpenAI's GPT-4V and related tools offer a wide array of opportunities for developers to build unique and innovative applications. The ability to blend different modalities, such as text, images, and audio, opens up new dimensions in AI-powered creativity.
As this technology continues to evolve, we can expect to see even more imaginative and practical applications emerge. From automatic website analysis to interactive website hacking assistants, the potential for AI-driven solutions is limitless.
In conclusion, OpenAI's GPT-4V and its related models are unleashing a new wave of creative and practical applications that blend various modalities. The video voiceover generator is just one exciting example of what's possible. With this powerful AI at our fingertips, we're on the cusp of a new era of innovation and automation. The future is looking more fascinating than ever.
Demo
- Original video
- Streamlit UI
- Terminal output
❯ streamlit run app.py

  You can now view your Streamlit app in your browser.

  Local URL: http://localhost:8501
  Network URL: http://10.0.0.10:8501

  For better performance, install the Watchdog module:

  $ xcode-select --install
  $ pip install watchdog

211 frames read.
"Within this heart-framed moment, love and dreams soar together, endlessly."
Moviepy - Building video /var/folders/zw/3xqsklyx27sdhmmwb5xfnbcr0000gn/T/tmpo9hbmf09_output.mp4.
MoviePy - Writing audio in tmpo9hbmf09_outputTEMP_MPY_wvf_snd.mp4
MoviePy - Done.
Moviepy - Writing video /var/folders/zw/3xqsklyx27sdhmmwb5xfnbcr0000gn/T/tmpo9hbmf09_output.mp4

Moviepy - Done !
Moviepy - video ready /var/folders/zw/3xqsklyx27sdhmmwb5xfnbcr0000gn/T/tmpo9hbmf09_output.mp4
- Output video
Text generated:
Within this heart-framed moment, love and dreams soar together, endlessly.
Copyright statement: Unless otherwise stated, all articles on this blog adopt the CC BY-NC-SA 4.0 license agreement. For non-commercial reprints and citations, please indicate the author: Henry, and original article URL. For commercial reprints, please contact the author for authorization.