Ollama Meets LLaVA - Recognize and Describe Your Images Locally
Unleashing LLaVA's Power: A Step-by-Step Guide to Local Deployment on Ollama

Previously I’ve posted LLaVA and Ollama related articles.
[Advanced] Build Agents with Vision Abilities Using OpenAI & AutoGen & Llava & Stable Diffusion
Explore AI vision agents with AutoGen and Llava, crafting images from text and iterative improvement, revolutionizing content creation and design.
 Henry
Henry
Crafting Conversations with Ollama-WebUI: Your Server, Your Rules
Empower your server with Ollama-WebUI—where conversations become an art. This guide unveils the steps to customize and deploy for a tailored conversational masterpiece.
HenryIn this article, I will walk you through the detailed step of setting up local LLaVA mode via Ollama, in order to recognize & describe any image you upload.
Set up Ollama Web-UI via Docker
mkdir ollama-web-ui
cd ollama-web-ui
nano docker-compose.yml
Edit docker-compose.yml
version: '3.9'

services:
  ollama:
    volumes:
      - ./ollama:/root/.ollama
    container_name: ollama
    # pull_policy: always
    # tty: true
    restart: unless-stopped
    image: ollama/ollama:latest

  ollama-webui:
    # build:
    #   context: .
    #   args:
    #     OLLAMA_API_BASE_URL: '/ollama/api'
    #   dockerfile: Dockerfile
    image: ghcr.io/ollama-webui/ollama-webui:main
    container_name: ollama-webui
    volumes:
      - ./ollama-webui:/app/backend/data
    depends_on:
      - ollama
    ports:
      - ${OLLAMA_WEBUI_PORT-3000}:8080
    environment:
      - 'OLLAMA_API_BASE_URL=http://ollama:11434/api'
    extra_hosts:
      - host.docker.internal:host-gateway
    restart: unless-stopped
Bring up the container
docker compose up -d
Download LLaVA model
- Access Ollama Web-UI via
http://localhost:3000 - Sign up any account
- Go to Settings - Models. Type
llava:7bunder Pull a model from Ollama.ai. You can check the model list via Ollama Model Library
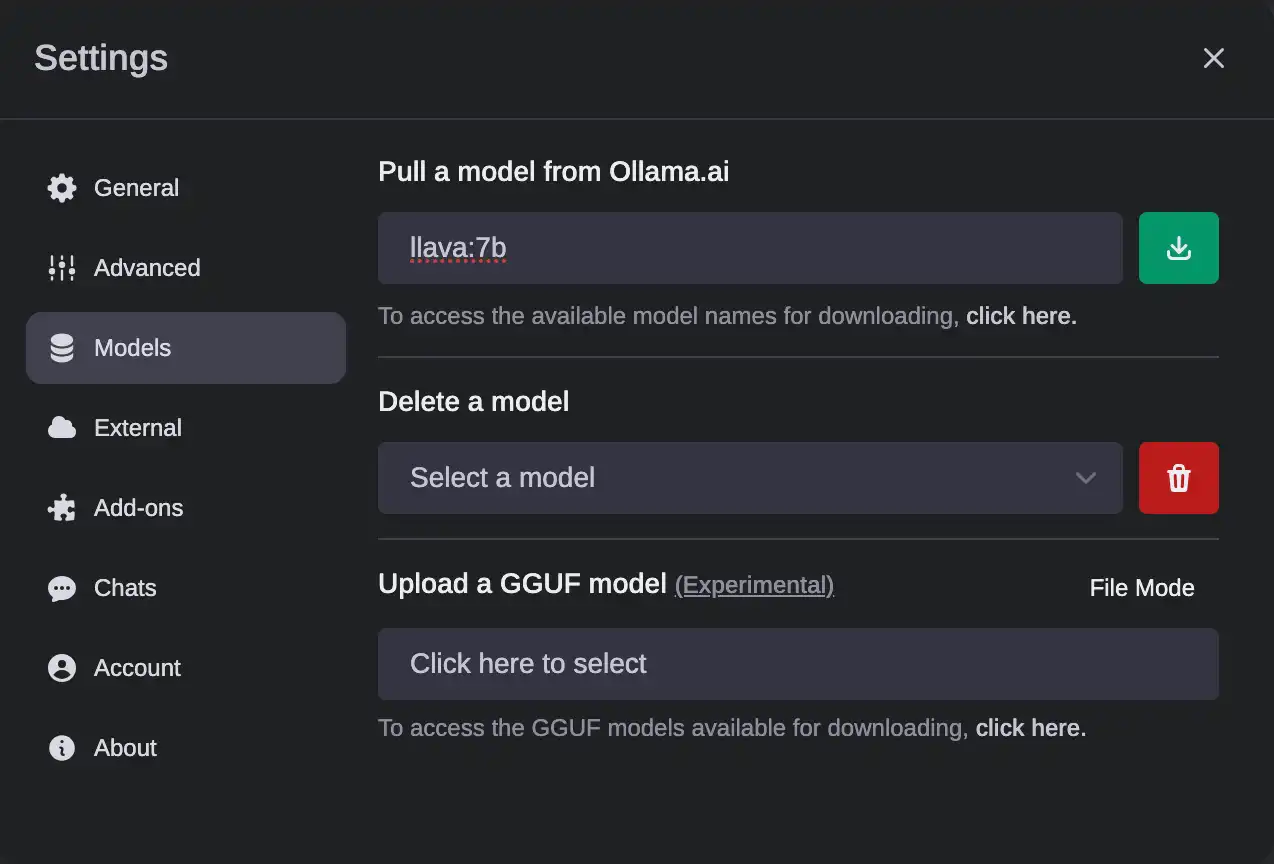
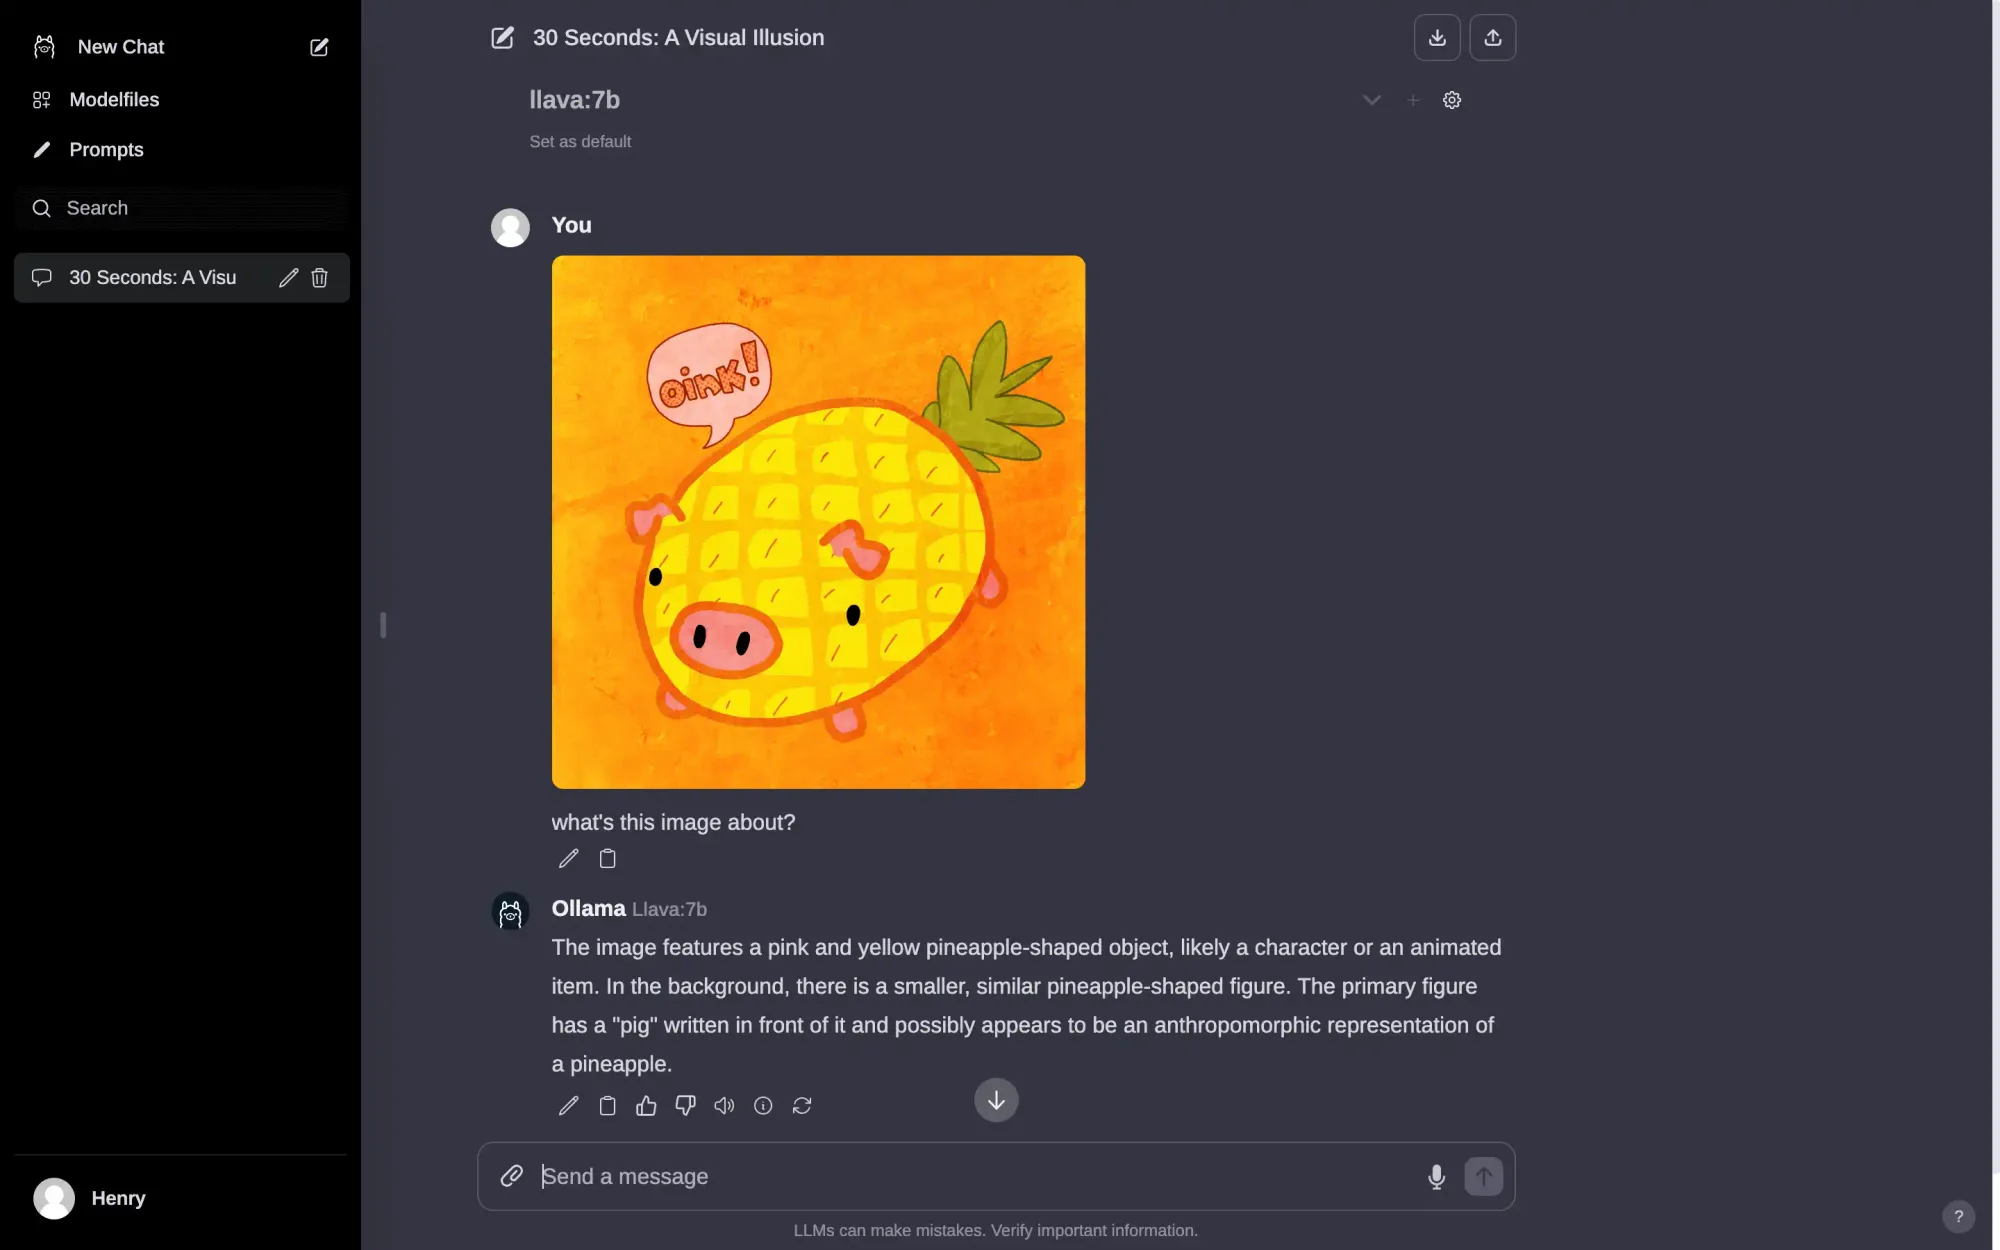
- Once the LLaVa-7B model is downloaded, select it in a new chat window.
- Upload your image along with the prompt
Demo
Copyright statement: Unless otherwise stated, all articles on this blog adopt the CC BY-NC-SA 4.0 license agreement. For non-commercial reprints and citations, please indicate the author: Henry, and original article URL. For commercial reprints, please contact the author for authorization.