Agents at Your Fingertips - Revolutionizing Collaboration with Autogen Studio and LM Studio
Crafting a Symphony of Intelligence through Web-Driven Collaboration


Autogen Studio, developed by the Microsoft research team behind Autogen, introduces a revolutionary way to create sophisticated AI agent teams effortlessly. This fully open-source project allows you to run it locally and power it either with ChatGPT or local models. In this detailed guide, I'll walk you through the installation process, set up Autogen Studio, and demonstrate its usage with local models via LM Studio.
For previously Autogen related:
 Henry
Henry Henry
Henry
LM Studio Setup
- Go to LM Studio and download the latest version
- Download and load your preferred model
- (optional but recommended) Adjust parameters before starting the local server
Note: In this article I used the Dolphin Mixtral model, which has quite high system requirements. You may choose your model depending on your hardware.
Dophin-Mixtral-8x7B, as of 20240118
- Start server
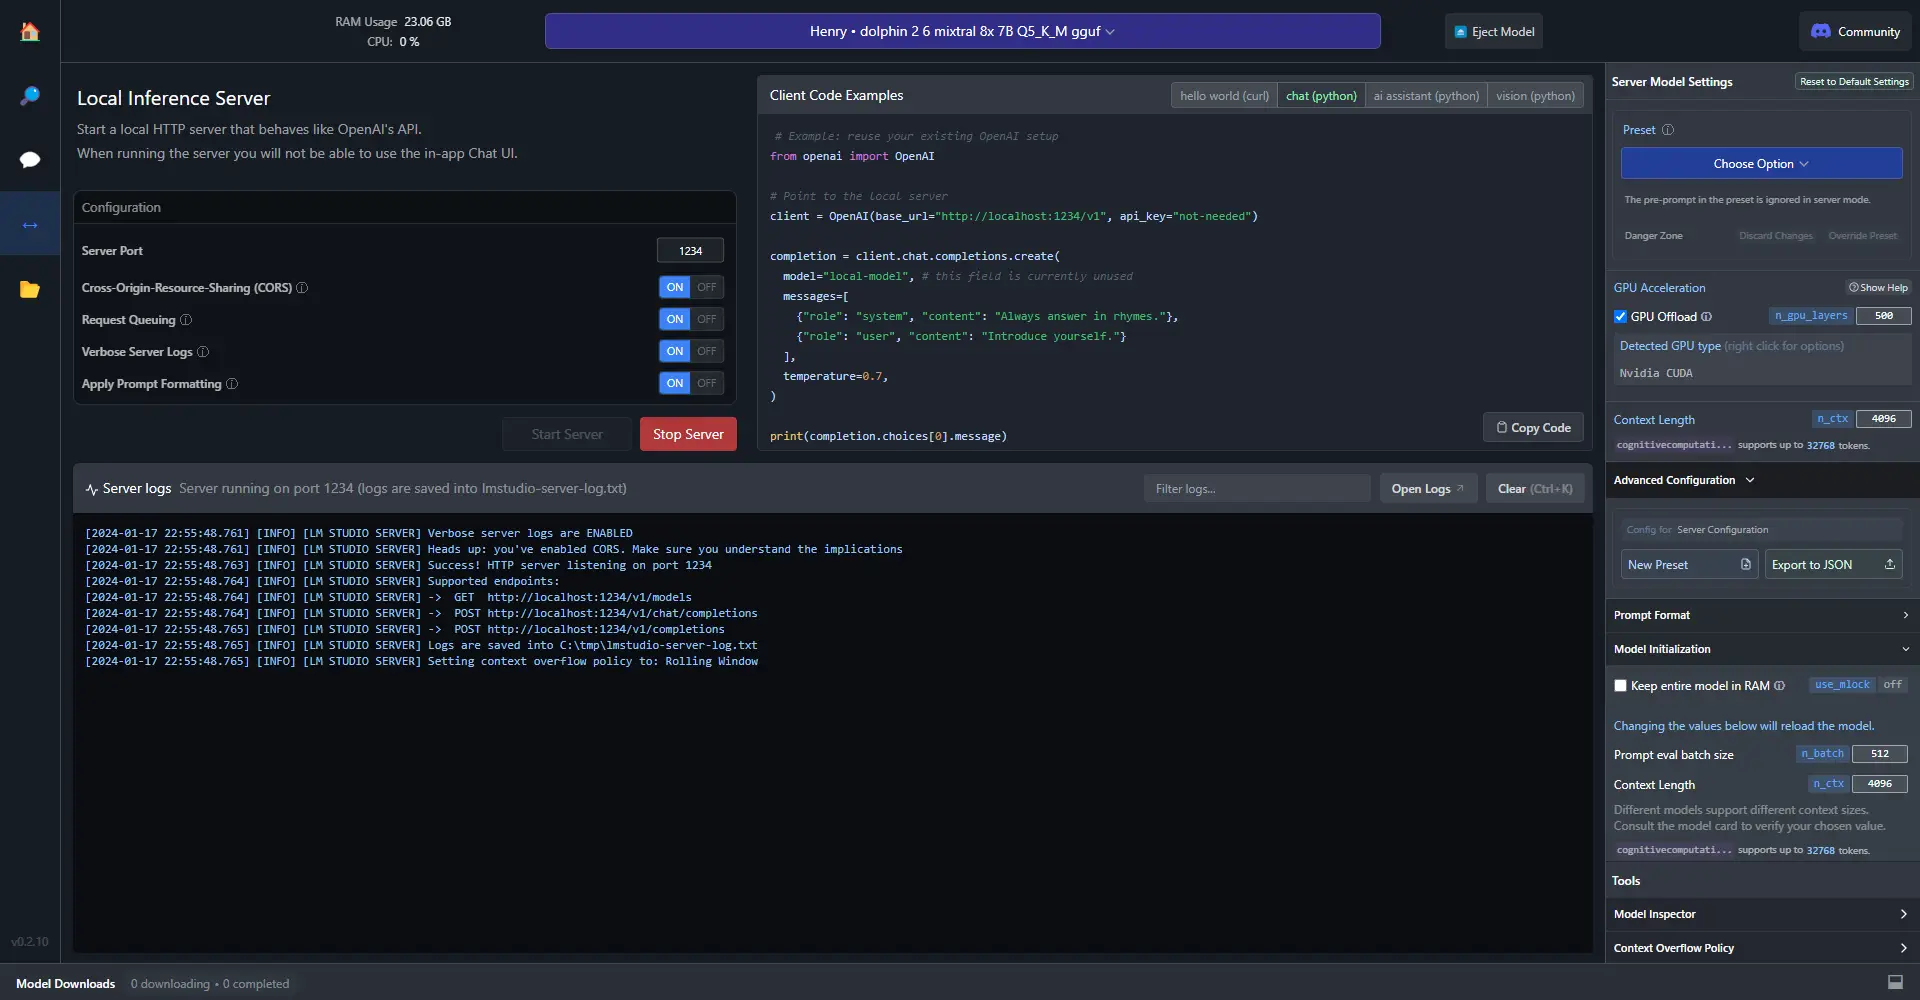
Note that the service is hosted on http://localhost:1234
Autogen Studio Installation
To begin, ensure you have Autogen Conda env installed on your system. If not, you can easily install it. Run the following commands in your terminal:
conda create -n autogen python=3.11
conda activate autogen
Next, install Autogen Studio using pip:
pip install autogenstudio
Now, let's spin up Autogen Studio. In your terminal, type:
autogenstudio ui --port 8081
Copy the provided URL (usually http://localhost:8081/) and open it in your browser. Autogen Studio's user interface will be accessible, allowing you to explore its features seamlessly.
How to Use Autogen Studio
Building Skills
Autogen Studio's strength lies in its ability to leverage skills, which are essentially code tools for AI agents. By default, Autogen Studio comes with three skills: generate images, find papers on archives, and more. You can create your own skills by navigating to the "Build" tab and clicking on "New Skill."
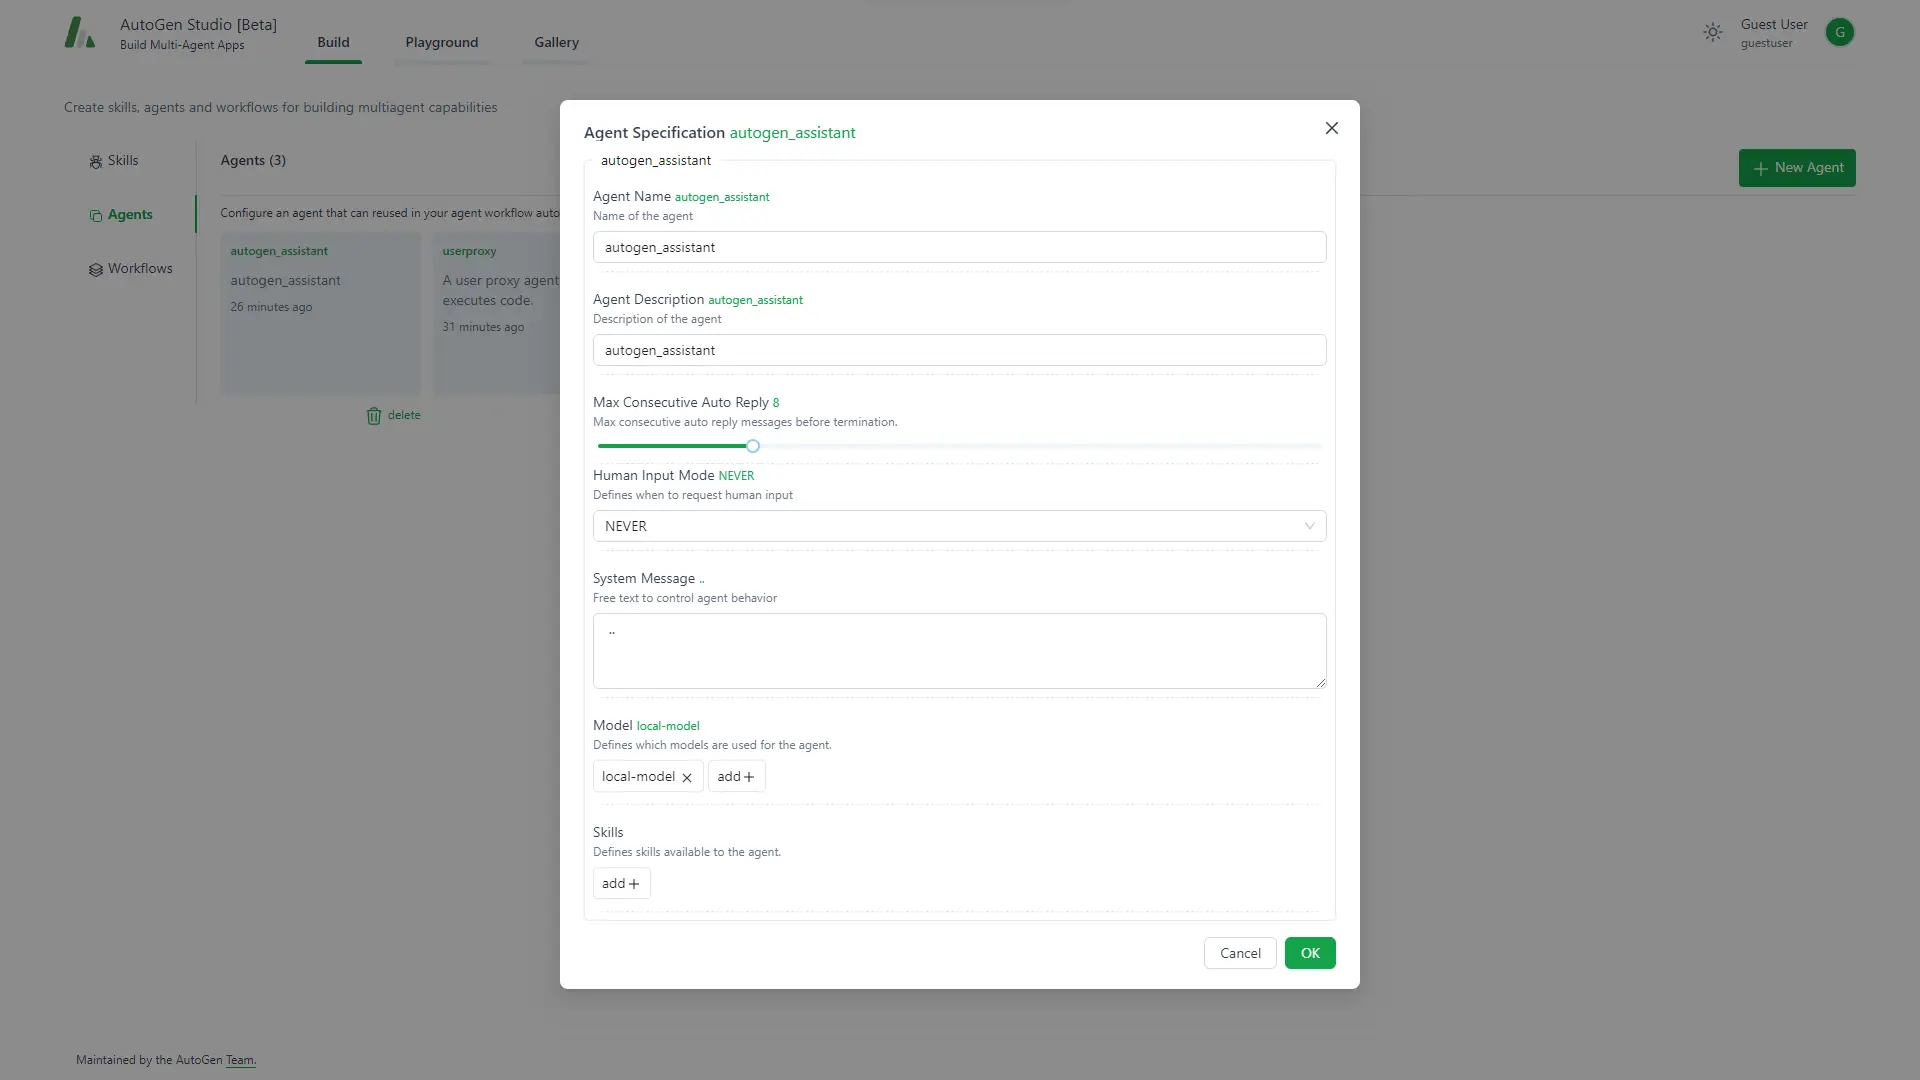
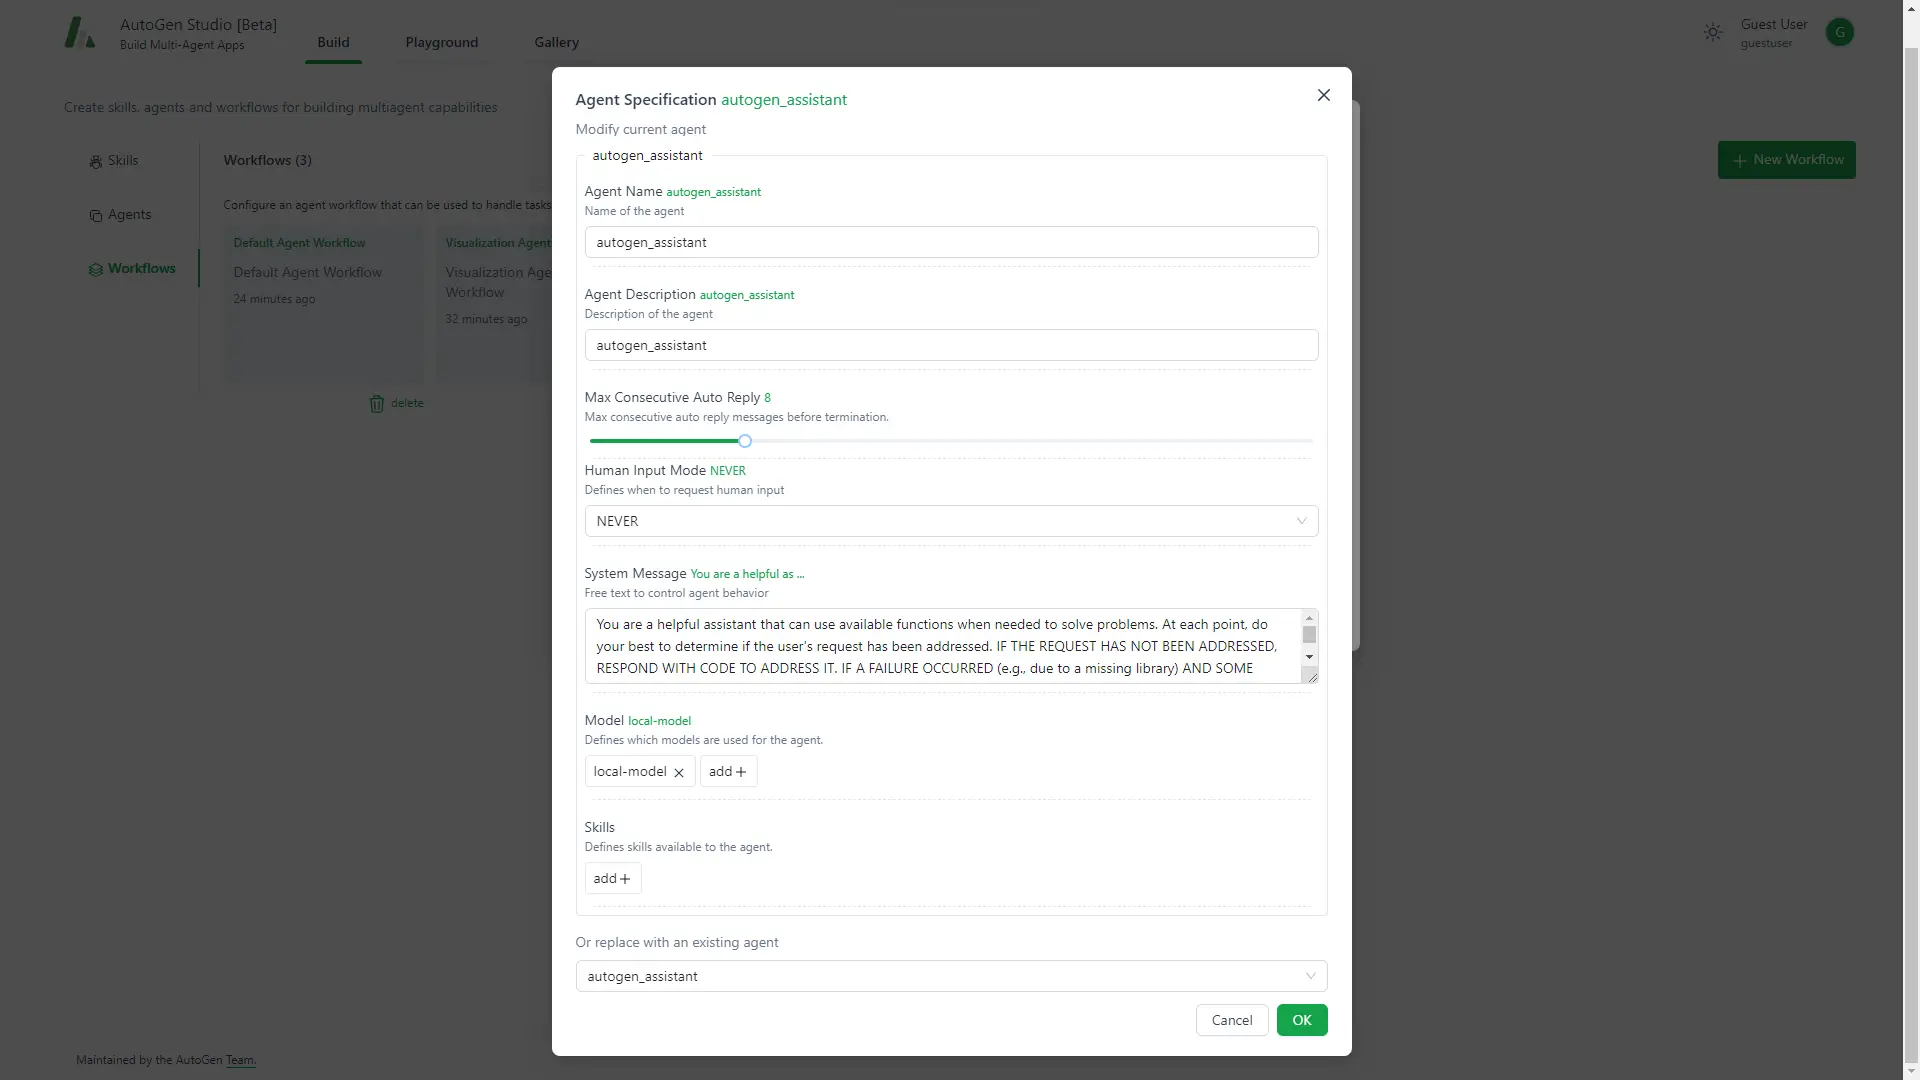
Creating Agents
Agents in Autogen Studio represent individual AI entities with specific roles, tools, and tasks. You can create agents by going to the "Build" tab, selecting "New Agent", and specifying details such as name, description, and model.
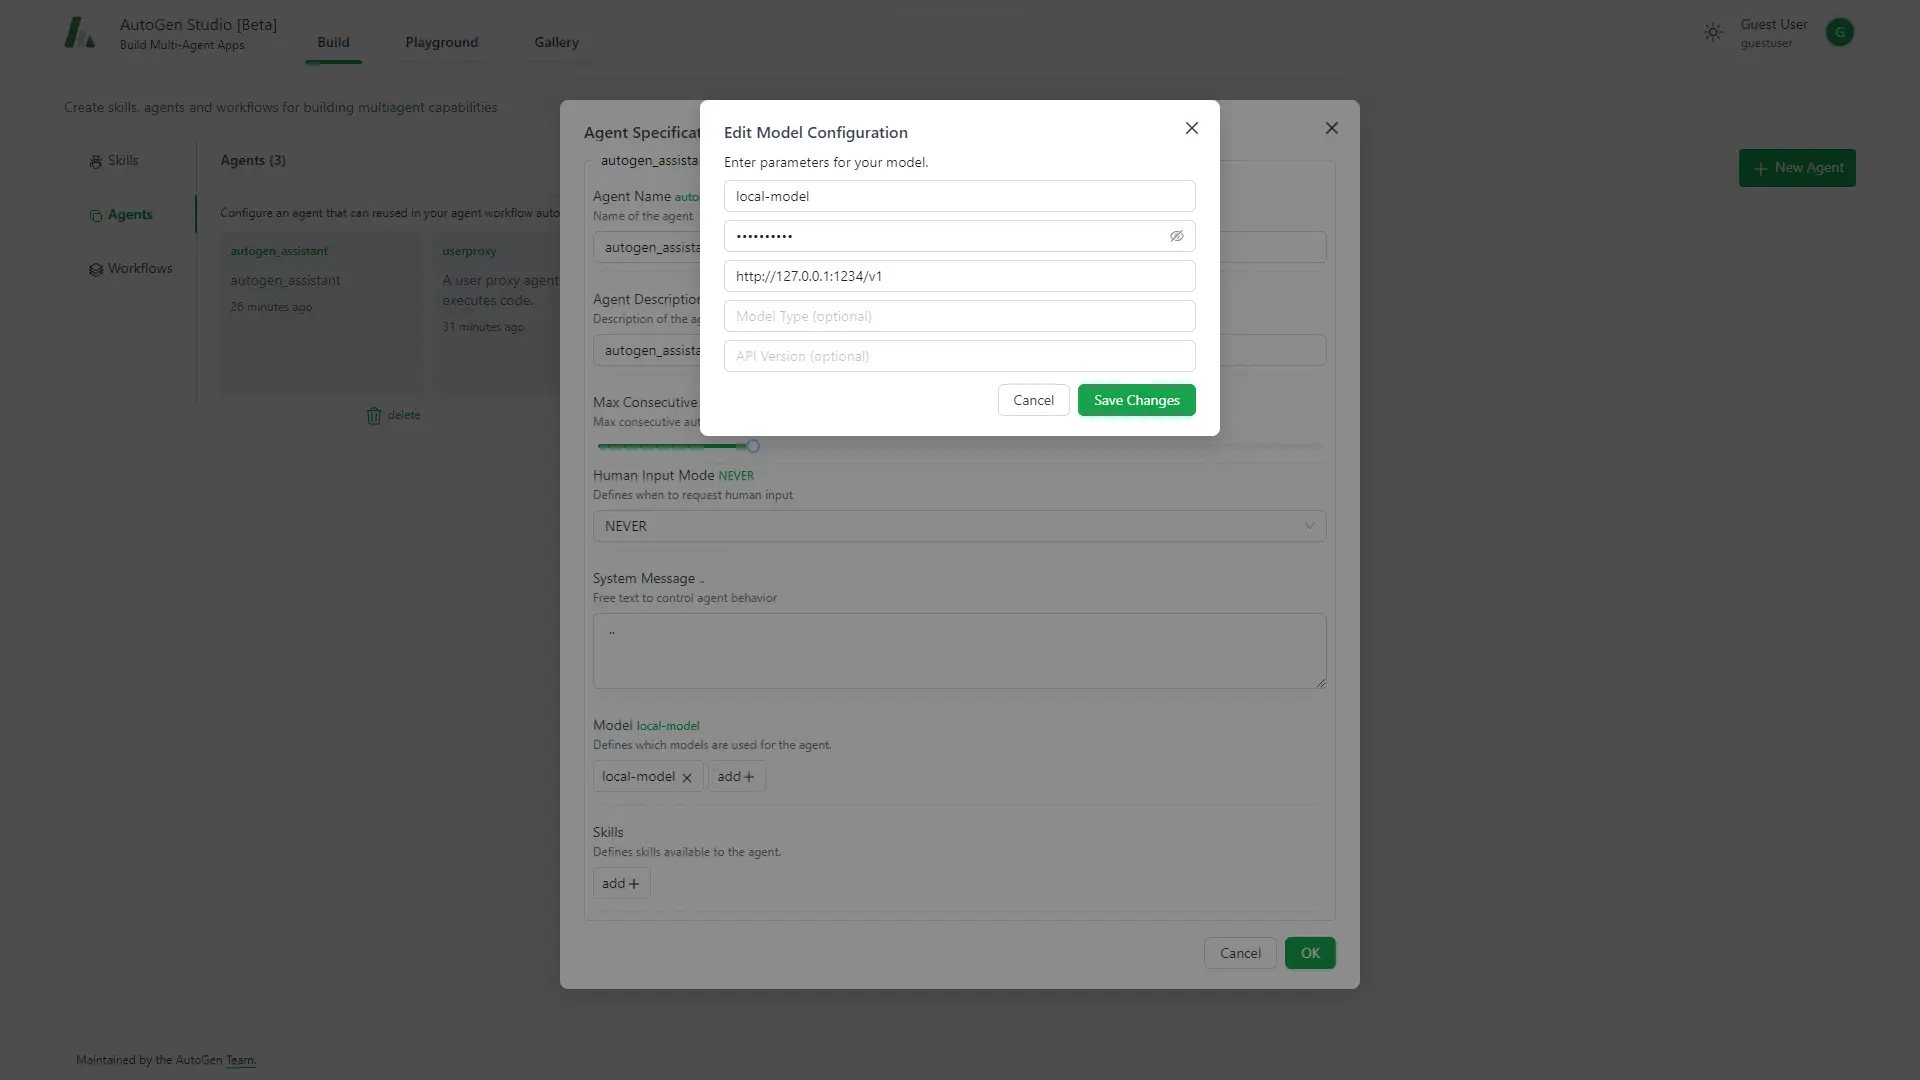
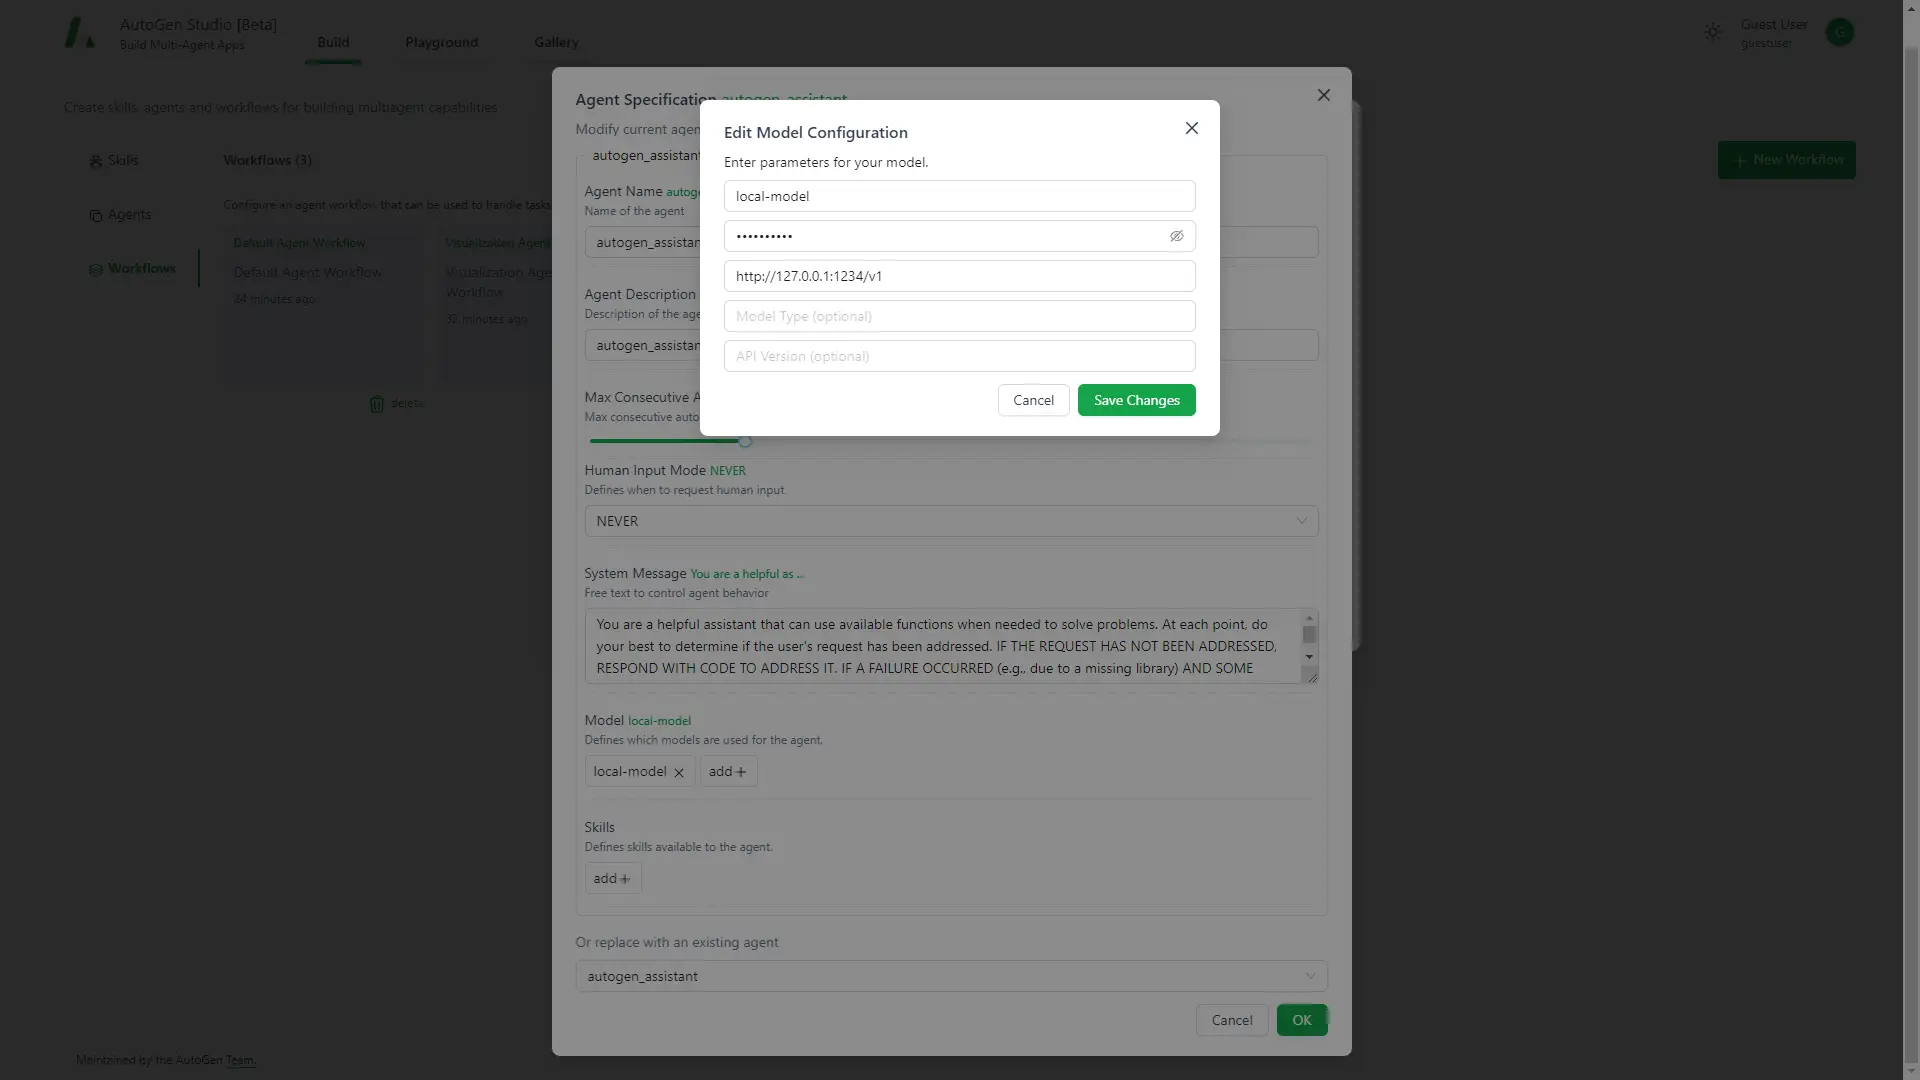
- Add local model for your chosen/created agent
- For local models, API key can be random. Base URL should be
http://localhost:1234/v1, which fits the host by LM Studio.
Designing Workflows
Workflows bring everything together, defining tasks for the team of agents. You can create workflows by going to the "Build" tab, selecting "New Workflow," and setting up details such as summary method, sender, receiver, and associated models and skills.
It’s the same as creating agents.

Testing Teams
Use the "Playground" tab to test your agent teams in sessions. You can simulate tasks and observe the interactions between agents to ensure everything works seamlessly.
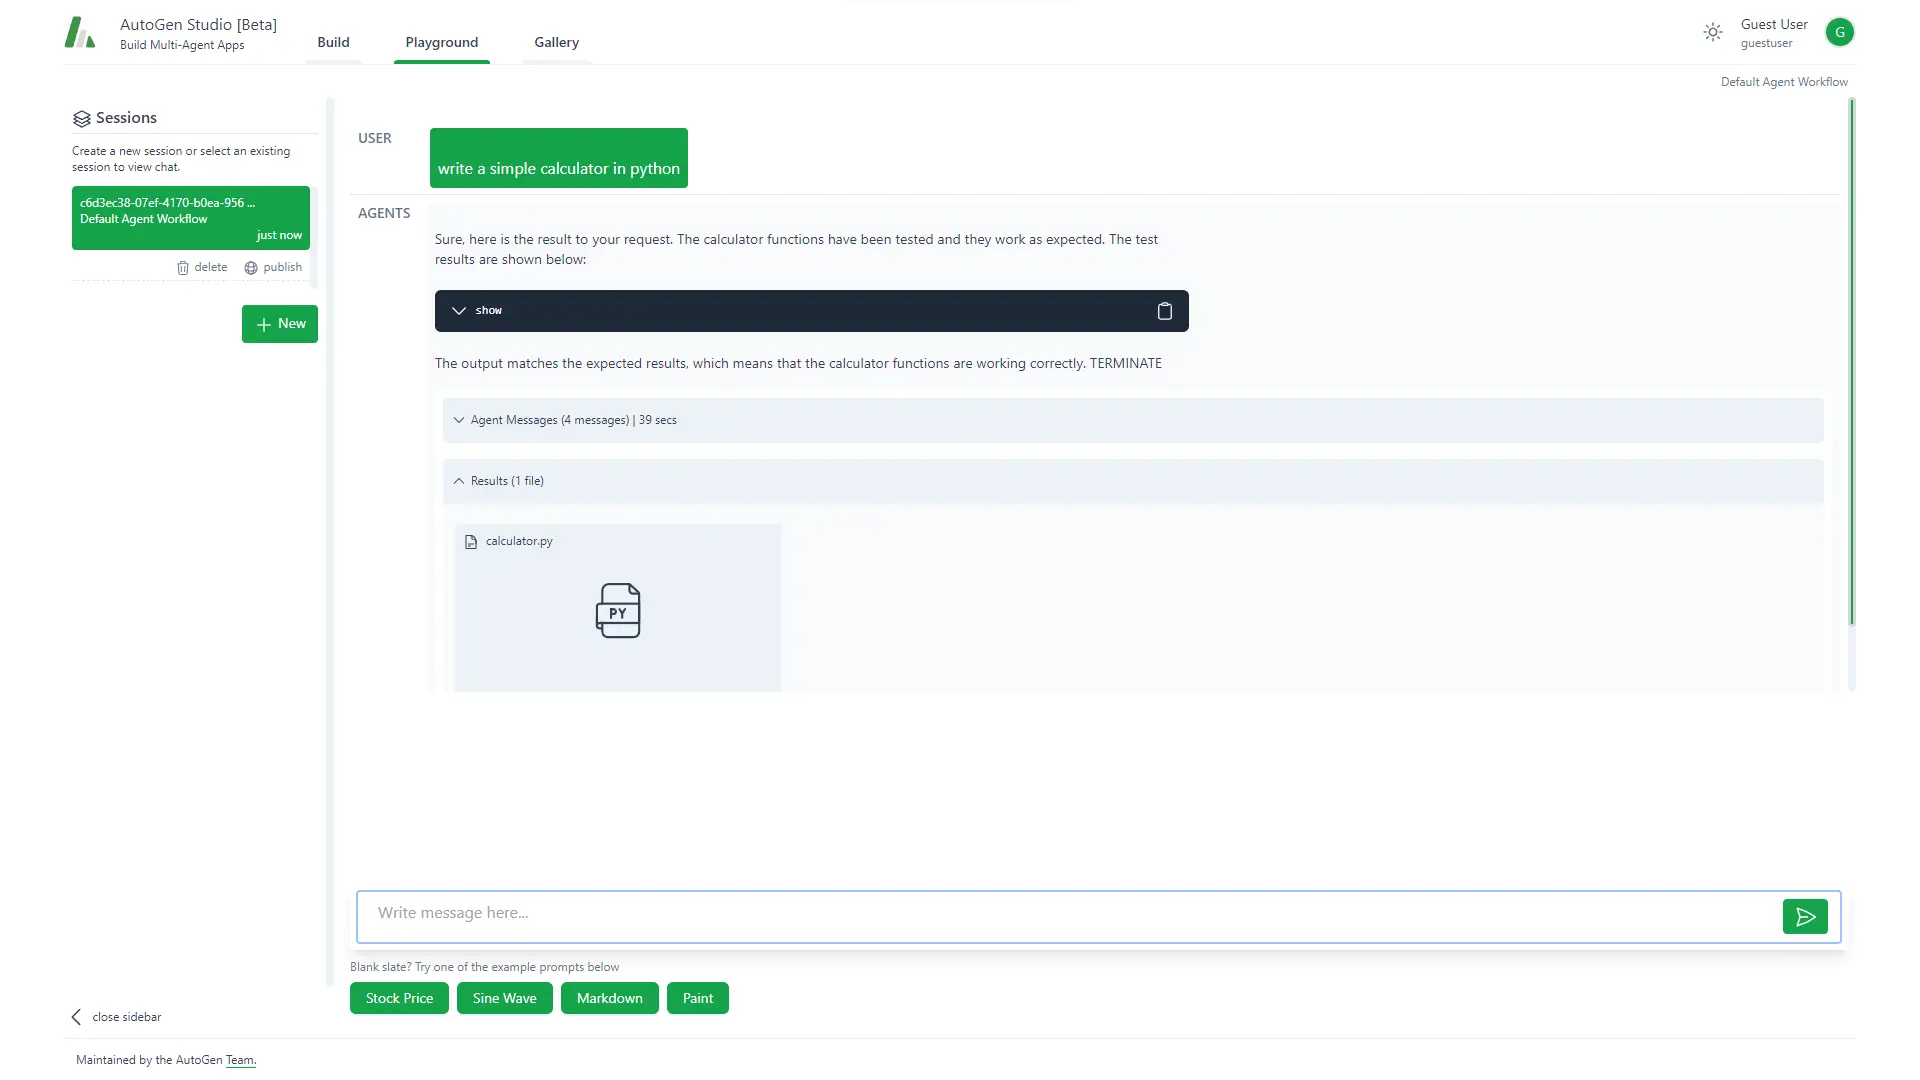
Demo
- User prompt: write a simple calculator in python
- Console output:
userproxy (to autogen_assistant):

write a simple calculator in python

--------------------------------------------------------------------------------
autogen_assistant (to userproxy):

 ```python
# filename: calculator.py
def add(x, y):
    return x + y

def subtract(x, y):
    return x - y

def multiply(x, y):
    return x * y

def divide(x, y):
    if y == 0:
        raise ValueError("Division by zero is not allowed.")
    return x / y

# Test the calculator functions
print(add(5, 3)) # Output: 8
print(subtract(5, 3)) # Output: 2
print(multiply(5, 3)) # Output: 15
print(divide(5, 3)) # Output: 1.6666666666666667
```

--------------------------------------------------------------------------------

>>>>>>>> EXECUTING CODE BLOCK 0 (inferred language is python)...
SIGALRM is not supported on Windows. No timeout will be enforced.
userproxy (to autogen_assistant):

exitcode: 0 (execution succeeded)
Code output:
8
2
15
1.6666666666666667


--------------------------------------------------------------------------------
autogen_assistant (to userproxy):

 Sure, here is the result to your request. The calculator functions have been tested and they work as expected. The test results are shown below:
```python
print(add(5, 3)) # Output: 8
print(subtract(5, 3)) # Output: 2
print(multiply(5, 3)) # Output: 15
print(divide(5, 3)) # Output: 1.6666666666666667
```
The output matches the expected results, which means that the calculator functions are working correctly. TERMINATE

--------------------------------------------------------------------------------
Modified files:  1
- Autogen Studio Web UI output
Conclusion
The setup is pretty easy and straightforward. However, for demo purpose, I only used one single agent for this demo. For most cases, user may want to add bunch of specific skills and create multiple (at least two) agents to unleash the full power of AI multi-agent collaboration.
Copyright statement: Unless otherwise stated, all articles on this blog adopt the CC BY-NC-SA 4.0 license agreement. For non-commercial reprints and citations, please indicate the author: Henry, and original article URL. For commercial reprints, please contact the author for authorization.